Your pasture grasses grow the most within a short window in time.
A window that appears after they’ve established healthy roots and a good reserve of carbohydrates. But a window that also ends before they begin to set seed and reproduce.
When we plot your grass growth VS time, we get an S-shaped curve that looks like this.
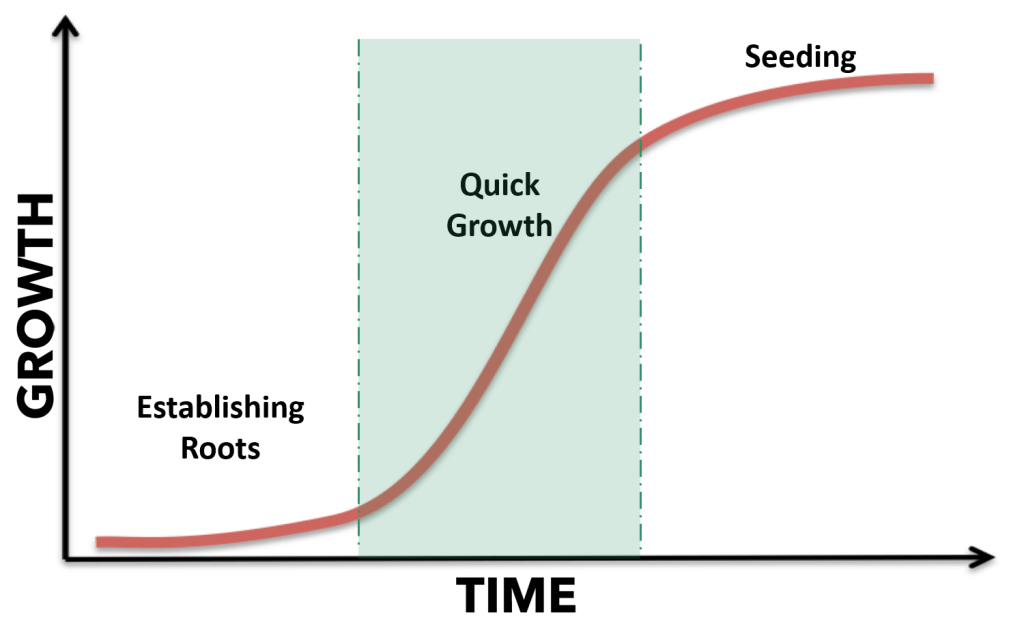
If you’re able to keep your pasture within this quick growth phase, you’ll be able to increase your annual pasture yields and production outcomes.
But keeping your pasture within this window of quick growth is closely linked to your grazing patterns. Graze too early, and your pasture will fall in the establishing roots phase. On the other hand, graze too late, and your pasture will fall in the seeding phase.
To get this right, you need to ensure that all your paddocks have right pre-grazing cover levels, before your herd enters that paddock for grazing.
Typically, your ideal pre-grazing cover will be between 2,700 and 3,300 Kg DM/ ha. And your ideal post-grazing target will be around 1,500 Kg DM/ ha.
Figuring out your ideal pre-grazing and post-grazing targets is the easy part.
The real difficulty lies in meeting these targets, after every grazing event, throughout the year. It’s difficult because your pasture growth rates will vary based on soil moisture, fertility and local weather conditions that include rainfall, humidity and temperature.
And also, your grazing needs will vary based on your calving season and market demand.
So, if you want to achieve your pre-grazing and post-grazing targets after every grazing event, you’ll need to stay on top of:
- Your herd and their changing nutritional needs
- Your pasture growth rate, changing across the year
Pasture.io simplifies both of this for you.
1. Staying on top of your herd’s needs:
Here’s a video that shows how to use Pasture.io to enter information about your various herds and their nutritional needs. It also shows you how to select feed slots and grazing paddocks.
You can easily find and edit all your herd information from your Pasture.io dashboard. Simply click on HERDS from the main menu. Or access your herd information by selecting GRAZINGS on your dashboard.

From here, you can see all your herds and also add a new milker, dry cow or heifer herd if needed.
You can also choose to assign a feed slot to each herd. And choose between a day or a night feed slot. If needed, you can also select both feed slots.
Simply click on a herd to edit information about it. You can easily change details such as the herd size or its feed slot. While editing feed slot timings, ensure that all your feed slots add up to 100% of the herd’s feed.

Now, that you know how to set your herd information on Pasture.io, let’s turn our attention towards finding the right paddock to graze for each herd.
2. Understanding your growth rates and selecting the best paddock to graze next:
The quickest way to select a paddock is by clicking on a feed slot of the herd you want to graze. This will take you into a new grazing entry.

From here, you can select a grazing paddock in two ways:
- By directly choosing a paddock visually from your farm map on the right.
- By looking at paddock information reports, and by selecting a paddock based on area, growth rate and available cover.
Both are useful in their own ways.
Choosing a grazing paddock directly from the map:
For instance, if you want to choose a grazing paddock from a few options, then hovering your mouse over these paddocks can quickly give you the information you need.
And in turn, allows you to quickly choose a paddock, from a few options.

Quickly choosing a paddock to graze next, from the map can be useful in late-spring or early-summer, when your growth rates are highest, and you have surplus pasture in most paddocks.
Choosing a grazing paddock from your reports:
On the other hand, choose REPORTS to get more information about pasture growth rates and cover levels, across all your paddocks.
Depending on your needs, the list view helps you rank your paddocks with respect to size, maximum growth rates or cover levels.
This can help you choose the best course of action when you don’t have surplus pasture growing in all your paddocks. Or when you are looking to earmark a few paddocks for silage.
So, you can easily select the best paddock to graze based on each paddock’s growth rate, cover levels and size. And effortlessly ensure that paddocks get grazed only when it has sufficient pre-grazing cover levels.
Refining your grazing events to maximise yields and nutritional value:
If you subscribe to our paid service, you’ll get automatic pasture growth rates every day. So, you can easily look at a paddock that was recently grazed, and find out what it’s post-grazing residual is.
And over time, you can fine-tune your grazing events to ensure that your pasture paddocks are always within the ideal window of quick growth. So that you get the most out of your pastures.
That’s how our farmers use Pasture.io to earn 60,000 to 80,000 dollars more, every year.
Interested in how Pasture.io can help you earn more profits from your pastures? Schedule a free 15-min call with us today.
Note: I originally wrote this for pasture.io/management/effective-grazing-decisions
